Archive for the ‘16-Top Wing Skins’ Category

February 16, 2013 (2 Hrs)

Posted: February 16, 2013 in 16-Top Wing Skins

Meghan and I finished up Section 16 – Top Wing Skins by spending two hours installing the Outboard Aileron Hinge Bracket Assemblies.  We first clecoed the brackets to the Trimmed Outboard Wing Rib (W-1012) and the Rear Spar Assembly and I final/match-drilled #30 the required holes.  We removed the brackets and deburred all of the holes, then clecoed them back onto the wing.  Finally we finished up by riveting them to the wing rib and the rear spar using AN470AD4 rivets.  Now Section 16 is complete!!!

IMG_7398     IMG_7399

February 14, 2013 (12 Hrs)

Posted: February 14, 2013 in 16-Top Wing Skins

Dad and I began riveting the Left Top Skin a few days ago and after seven hours we had completed a good amount of work.  Meghan helped me for an hour riveting what was left of the skins forward edge into the Main Spar.  Then Mitalee and Dad spent four hours riveting the last few ribs and the whole rear spar to the skins.  We have finally finished riveting the Left Top Skin!!!

IMG_7332     IMG_7333

IMG_7340     IMG_7347

IMG_7348     IMG_7349

February 7, 2013 (9 Hrs)

Posted: February 7, 2013 in 16-Top Wing Skins

We have finally finished riveting the Right Wing Top Skins!!!  This took a lot longer than I thought it was going to.  What we initially did was start back riveting using the Cleveland and Avery Aircraft Tools back riveting sets with a 6lb bucking bar so that we could have a very smooth skin surface.  The Back Rivet Straight Set (12”) from Cleveland Aircraft Tools worked great as long as it could reach the rivets.  However when I could not, I switched to the Extra Long (12”) Double Offset Back Rivet Set from Avery Tools, but found that the larger diameter got against the ribs and caused the rivets to set sideways leaving me drilling and replacing them.  Also trying to pound in those rivets tended to take a lot longer than expected, perhaps due to the material they used to make the tool.  So we switched to a using the Flush Swivel Rivet set with the rubber boot from Avery Tools and my favorite tungsten bucking bar.  The results were much faster and better looking rivets, though possibly not having as smooth of a top skin.  Once we were finished we carefully looked across the skins at different angles to see if we could see a difference.  We could see some difference between conventionally and back riveting, but it’s an aluminum airplane and using the tungsten bar made it a lot easier and less frustrating.  Either way the right side is completed, now we have the left wing to look forward to!!!

IMG_7319     IMG_7324

IMG_7327     IMG_7328

Over the past week I have been able to slowly work on the Top Wing Skins.  First I was able to get all of the Top Skins clecoed onto the Main Wing Assemblies.  Next, with Dad’s help, we began riveting the Right Wing Top Skins.  We are almost finished with the right side but we still have the left side to look forward to!!!

IMG_7288     IMG_7290

IMG_7292     IMG_7309

August 7, 2012 (4 Hours)

Posted: August 7, 2012 in 16-Top Wing Skins

Over the past few nights we have diligently worked on getting the skins dimpled.  With all the help I got we were able to get all the skins dimpled and ready for primer.


August 4, 2012 (4 Hours)

Posted: August 4, 2012 in 16-Top Wing Skins

Tonight I started working on making the skin joints more aesthetically pleasing and basically used the same setup as I had seen on MyRV10.com.  I used the sander and some 40 grit sandpaper to start removing material from the top outboard side of the Top Inboard Wing Skins (W-1002) and the lower inboard side of the Top Outboard Wing Skins (W-1003).  Once I felt like I had removed enough material I used some 120 and 220 grit sandpaper to smooth out the rough surface that the 40 grit had created.


August 3, 2012 (4 Hours)

Posted: August 3, 2012 in 16-Top Wing Skins

I was able to finish deburring the last outboard skin while Meghan helped me out by dimpling all of the upper flanges of the ribs, except for the four inboard ones.  Then she dimpled the upper flange of the rear spars and all the Wing Box J-Stiffeners.


The last few weeks have unfortunately not been very productive; however I was able to get the plastic strips melted off the rest of the skins in preparation for dimpling.  I dimpled and machined countersunk for a #8 flush head screw where I had previously final drilled the #19 holes.  I also countersunk the rivet holes on the inboard skins that correspond to the Wing Walk Doublers (W-1027A & B) for a AN426AD3 rivet.  Finally I was able to debur almost everything except one outboard skin.


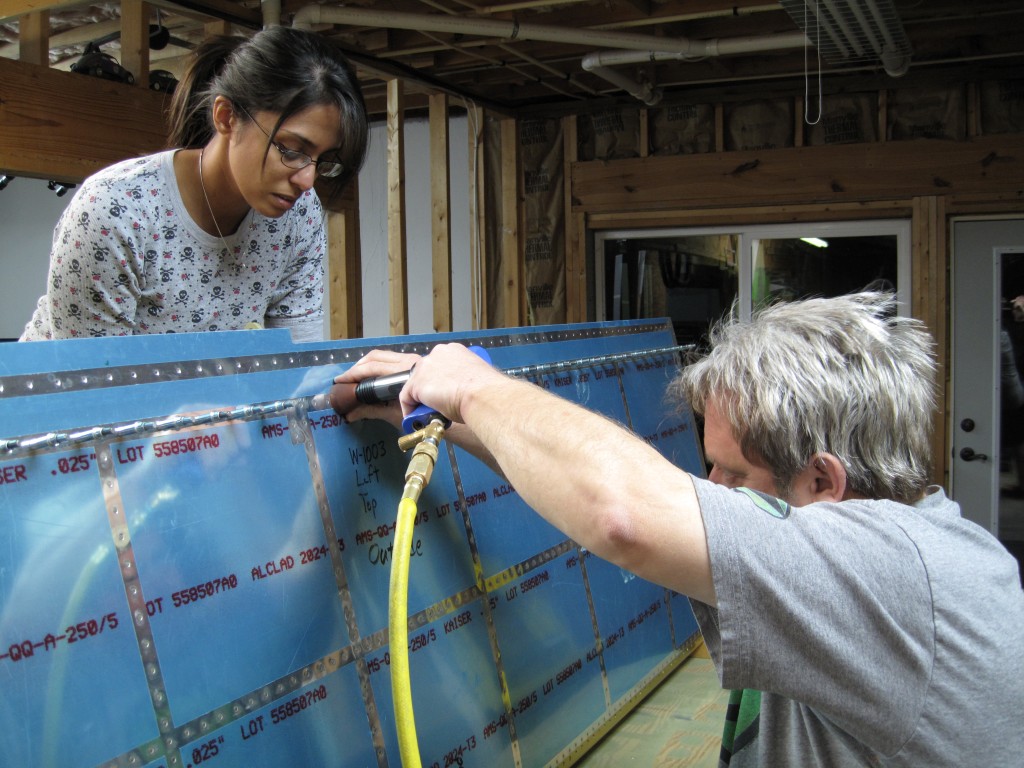
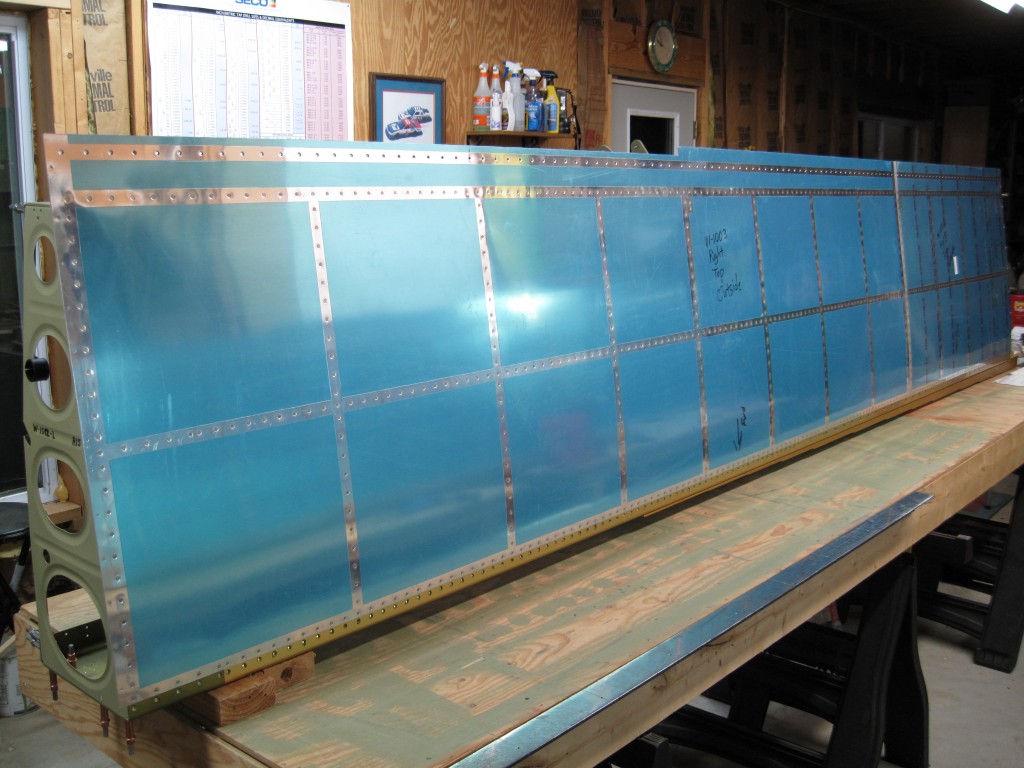
Meghan and Dad came down to help out so the first thing on my agenda was to reassemble the Rear Spar Assembly.  Once that was complete we started laying the J-Stiffeners into the cutouts in the wing ribs and then began clecoing the Wing Walk Doublers (W-1027A & B), the Top Inboard Wing Skin (W-1002), and the Top Outboard Wing Skin (W-1003) to the Main Spar, Rear Spar, and Wing Ribs.  Next Dad began final-drilling #40 all the holes common to the Top Wing Skins, the Spars, J-Stiffeners, Wing Walk Doublers, and Ribs.


While he worked on that I helped Meghan start identifying and assembling the Ailerons.  She started by clecoing the Nose Ribs (A-1004), Inboard Nose Ribs (A-1015), Doublers (A-1008), and the Spacers (A-1014) to the Spar (A-1003).  Next, she final-drilled #30 all the holes specified on the drawing for the Nose Ribs and the Doublers.  Then she laid the Counterbalance (A-1009) into the Nose Skin (A-1001A) and we began clecoing the Nose Skin to the Nose Ribs and the Spar.


Once everybody else had had enough, I went ahead and final-drilled the remaining #40 holes and the #19 screw holes for the nutplates that will be installed along the inboard edge of the Top Inboard Wing Skins (W-1002).  Then I went back to the ailerons and match-drilled #40 into the Counterbalance (A-1009) along the leading edge of the Nose Skin (A-1001A).  Finally I went back though and final-drilled #30 the same holes and called it a day.