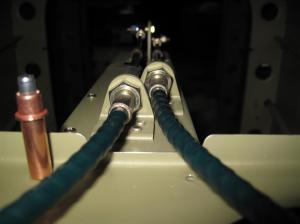
I spent the evening cutting out a relief so that the trim cables were not rubbing against the Aft Deck flange. Once that was completed I began disassembling everything and getting ready to move it all to the hanger.
Archive for the ‘07-Assembly’ Category
I placed the Elevator Trim Actuator Sub-Assembly (F-1095) in the aft fuselage and began routing the Elevator Trim Cables (CT Q-43) through the holes in the Horizontal Stabilizer and into the Elevators. Next I attached the Elevator Trim Actuator Sub-Assembly to the Fuselage Aft Deck (F-1014). Then I threaded the Cover Plates (E-616PP) onto the Elevator Trim Cables, attached the Cover Plates to the Elevators, and ran the Trim Servo to the “FULL NOSE UP” position. I temporarily attached the Elevator Trim Cables to the Elevator Trim Tab Horns and then ran the Trim Servo in both directions to make sure everything worked (RV-10 Elevator Trim Tab Test).
The first thing to do today was to enlarge the mounting holes on the Trim Servo by drilling #28 holes. I then reduced the thickness of the actuating lug on the trim servo so that it would fit in the Trim Servo Link Sub-Assembly (F-1095D/E). Next I attached the Trim Servo Link Sub-Assembly to the Trim Bellcrank (F-1095B). Now I was able to install the two Elevator Trim Cables (CT Q-43) onto the Trim Bellcrank and then ran the servo to its full retracted position. I checked all the cables and tightened the jam nuts. Finally I ran the trim servo through its full range of motion and verified that the Trim Bellcrank (F-1095B) had no binding or interference.
Tonight I came home and started bolting on the Vertical Stabilizer to the Aft Fuselage Bulkhead Assembly (F-1012). I had to final drill the holes and countersink a couple of them before installing the hardware called out for. Next I bolted the Elevators to the Horizontal Stabilizer and ensured they swung freely with no resistance (RV-10 Elevator Test). I then installed the Elevator Pushrod (F-1091) to the Elevator Horns (WD-605-L-1 & -R-1) and to the Bellcrank Assembly (F-635). I checked the elevator travel and ensured the correct amount of angle was still available. Next I secured the elevator in the trail position and used my 91.4° template to adjust the rod end bearings on the Elevator Pushrod (F-1091) until the angle of the Bellcrank Assembly matched my template. Finally I bolted the Rudder to the Vertical Stabilizer and made sure it swung freely and traveled 35° in both directions.
Tonight I cut out a 2×4 wood block that would fit tight between the Horizontal Stabilizer Front Attach Brackets (HS-1008). I clamped it down on the Aft Deck (F-1014) and drew some reference marks to aid in alignment. I clecoed my tape measure to the one center hole in the tailcone, as was shown, and measured to the center of the rivet on the back corners. Once both sides were reading the same for me, I had my dad and my brother double check my measurements. All three of us came out with the same measurement on both sides (95-3/32”)!!! Therefore I continued with match-drilling the Shims (F-1098), Aft Deck (F-1014), Spacer (F-1010B), and Angle (F-1010A) using a 3/16” drill bit. Once everything was deburred, I temporarily bolted the horizontal stabilizer to the tailcone. Then I bolted the Vertical Stabilizer Attach Bracket (VS-1016) to the Front Spar (HS-1002) and added the torque seal so that I know I had them to spec.
I started tonight off by final-drilling the vertical stabilizer attach holes in the Vertical Stabilizer Front Spar Attach Bracket (VS-1016) using a #12 drill bit and deburred the part when finished. Then using some doubled sided tape I attached the Shims (F-1098) to the underside of the Horizontal Stabilizer Front Spar Attach Brackets (HS-1008). I then laid the horizontal stabilizer onto the tailcone and clecoed it to the horizontal stabilizer attach bars. Finally I match-drilled #12 the four holes in the horizontal stabilizer attach bars and installed the required hardware as each hole was drilled.


