Archive for the ‘22-Flap’ Category

October 3, 2013 (6 Hrs)

Posted: October 3, 2013 in 22-Flap

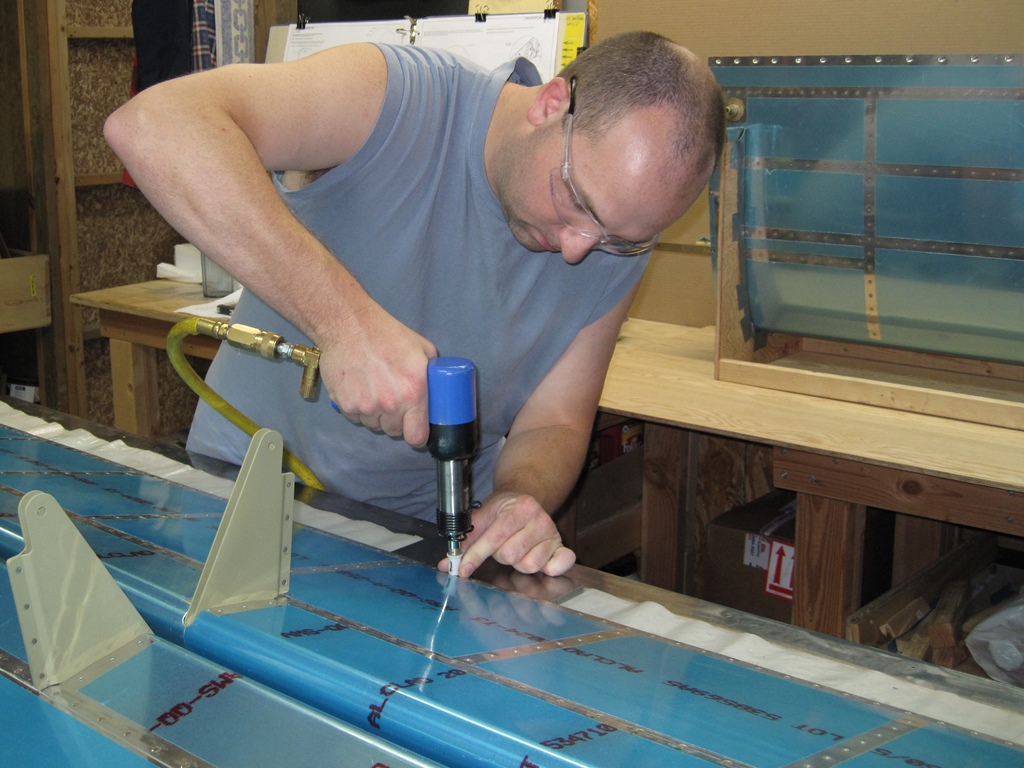
Now that the Fuel Tank Sealant has had time to cure along the Trailing Edges of the Flaps, I continued by removing all the clecoes along the Trailing Edge and cleaned out the holes with a drill bit. Next I final-drilled #33 the Bottom Skin and Main Ribs so that I could blind rivet them together using the MK-319-BS pull rivets. I also riveted each end of the Flap using my hand squeezer and AN426AD3-3.5 solid rivets.

IMG_7974     IMG_7980

Finally I back riveted the Trailing Edge just like I had done before, by first setting the tool parallel to the surface of the back riveting plate and rotating the tool to be parallel with the surface of the rudder as I riveted. I set all the AN426AD3-3.5 rivets half way, then came back with my mushroom set and riveted the shop head flush with the Bottom Skin.

IMG_7981     IMG_7987

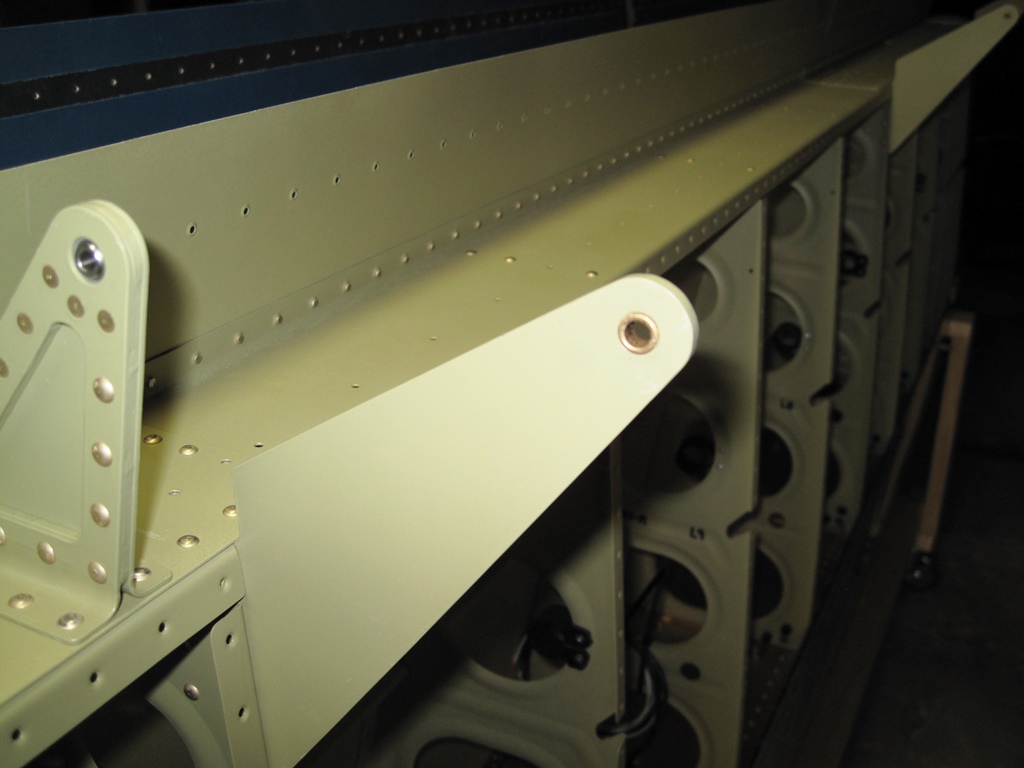
Now just a few more steps before I call it a night. First I pressed a Bushing (1/4X3/8X.25) into the flap attach hole on all six of the Flap Hinge Brackets (W-1025A). Next I attached the Rod End (CM-4M) to the Flap’s inboard end with the bolt (AN4-11A) and washers (AN960-416 & -416L) called for on the drawing. Lastly the torque range for an AN4 bolt is 50-70 in-lbs.; therefore I torqued the bolts to 60 in-lbs.

IMG_7997     IMG_8000

Feb. 27, 2013 (4 Hrs/1233 Tot)

Posted: February 27, 2013 in 22-Flap

Over the last couple of days, I have been working on the Flaps.  I first riveted the Main Ribs (FL-1005) onto the Spars (FL-1003) using the AN470AD4-4 rivets called out for.  I found these were easier to squeeze rivet first because of access issues with the ribs and the squeezer in a few places.  Next I riveted the Nose Ribs (FL-1004), Rod End Ribs, Hinge Pairs, and Center Hinge Subassemblies to the Spars.  I did have to use the rivet gun and tungsten bucking bar on the ends because my squeezer would not fit properly.  Now I have two Flap skeleton frames that are ready to be skinned.

IMG_7421     ???????????????????????????????

???????????????????????????????     ???????????????????????????????

February 19, 2013 (4 Hrs)

Posted: February 19, 2013 in 22-Flap

Tonight Mitalee came over and spent four hours riveting the Outboard & Inboard Rod End Rib Subassemblies and the Left & Right Hinge Rib Subassemblies together.  I riveted the Center Hinge Assemblies together with AN470AD4-10 rivets and double flush riveted the joggled flanges together along with the Hinge Pair Subassemblies.

IMG_7400     IMG_7401

IMG_7402     IMG_7405

October 23, 2012 (19 Hrs / 1015 Total)

Posted: October 23, 2012 in 22-Flap

Over the past week we have steadily deburred, dimpled, and countersunk all of the flap components.  With Dad’s help, we were finally able to finish dimpling all of the flap skins and then I countersunk the Trailing Edges (FL-1009A & B) so that they will accept the dimpled skins.


October 15, 2012 (3 Hours)

Posted: October 15, 2012 in 22-Flap

Tonight Meghan and I began disassembling the flaps and labeling the parts so that we can get them back in the same position during final assembly.  I went ahead and countersunk the #40 holes on the joggled portion of all the Hinge Brackets (FL-1007).  Then I began deburring all of the parts edges and holes.


October 14, 2012 (6 Hours)

Posted: October 14, 2012 in 22-Flap

Today I began final/match-drilling all of the skin holes to #40 and ensured that when I drilled the trailing edges to stay perpendicular to the centerline of the extrusion (VA-140).  Next I trimmed off the trailing edges and sanding them down to be flush with the inboard and outboard edges of the skins.  Then I installed the required hardware into the Hinge Brackets (FL-1007), clamped the edges together, and match-drilled the #40 holes into the other brackets.  Finally I marked the brackets so that I can place them in the correct position later on.


October 12, 2012 (5 Hours)

Posted: October 12, 2012 in 22-Flap

Now it’s time to start constructing the flap skeletons, therefore I clecoed the Nose Ribs (FL-1004), Main Ribs (FL-1005), rod end rib, hinge pair, and center hinge subassemblies to the Spar (FL-1003).  Next I final-drilled all the common holes to #30 and both flaps are ready to be skinned.


I began by clecoing the Bottom Skin (FL-1002) on first and then the Top Skin (FL-1001C), followed by the Inboard & Outboard Nose Skins (FL-1001A & B).  Finally I clecoed the Trailing Edges (FL-1009A & B) to the Top and Bottom Skins and marked the edges that will be trimmed later.


October 11, 2012 (3 Hours)

Posted: October 11, 2012 in 22-Flap

I came home tonight and clecoed together the hinge subassemblies and installed the hardware to maintain alignment.  Next I final-drilled the common 1/8” holes to #30, disassembled the parts, deburred the holes, and clecoed them back together again, minus the hardware.


Then I began trimming away the tab, with no pre-punched hole, on each one of the Flap Main Ribs (FL-1005) and finally deburred the edges.


October 8, 2012 (4 Hours)

Posted: October 8, 2012 in 22-Flap

I drilled out the joggled portion on six Hinge Brackets (FL-1007), three left-hand and three right-hand.  Next I clecoed together the right outboard and inboard rod end rib subassemblies, final drilled and countersunk all the holes called out for.  Then I clecoed  together the other two left and two right hinge pair rib subassemblies using a Nose Rib (FL-1004) and a Hinge Bracket (FL-1007) and final-drilled #30 all the common 1/8” holes.


Finally I checked the flatness of the four Spacers (FL-1008), laid out the hole locations, and drilled a 1/16” hole at each point.  Then I clecoed together two Spacers and match-drilled a 1/4” hole into each location.  Once all Spacers were match-drilled, I got my Unibit out and opened the two smaller holes to 1/2″ diameter and the larger one to 7/8” diameter.  I needed 1” on the larger diameter but I do not have a Unibit with that size, therefore I had my Uncle help me ream out the larger holes to 1”.


October 7, 2012 (4 Hours)

Posted: October 7, 2012 in 22-Flap

Today I started building the flap cradles while Meghan started clecoing together the outboard and inboard rod end rib subassemblies.  First she checked and adjusted all the flange angles to 90°, except for the two inboard ribs that had to be over bent so they will hug the tapering fuselage.  Next she clecoed a couple of Doublers (FL-1006) to a couple of Nose Ribs (FL-1004) and final-drilled the common 1/8” holes to #30.  Then she drilled the 1/4” holes and match-drilled the two 3/32” holes to #40 (outboard rod end rib assembly only).  She then countersunk those two #40 holes for an AN426AD3 rivet.  Next she clecoed together two left and two right hinge pair rib subassemblies using a Nose Rib (FL-1004) and a Hinge Bracket (FL-1007) and final-drilled #30 all the common 1/8” holes.  Finally I laid out the drill pattern on the joggled portion of the Hinge Brackets (FL-1007) and will drill them to #40 tomorrow.