Archive for the ‘21-Aileron’ Category

November 6, 2013 (3 Hrs)

Posted: November 6, 2013 in 21-Aileron

Now that the Fuel Tank Sealant has had time to cure along the Trailing Edges of the Ailerons, I continued by removing all the clecoes and cleaned out the holes as I had previously done. Next I back riveted the Trailing Edge just like before, by first setting the tool parallel to the surface of the back riveting plate and rotating the tool to be parallel with the surface of the rudder as I riveted. I set all the AN426AD3-3.5 rivets half way, then came back with my mushroom set and riveted the shop head flush with the Bottom Skin.  I then proceeded to create the pair of Spacers (A-1012 & -1013) from the AT6-058 X 5/16 material and primed them once they were ready. Finally I installed the Inboard (A-1007) and Outboard (A-1006) Hinge Brackets to the Aileron assemblies using the hardware that was specified. Now the Ailerons are ready to be attached to the Main Wings.

IMG_8096     IMG_8098

Oct. 30, 2013 (5 Hrs/1580 Tot)

Posted: October 30, 2013 in 21-Aileron

I came home tonight and started out by cleaning the Trailing Edges and the Skins with Lacquer Thinner. Next I mixed up a batch of fuel tank sealant and applied a thin coat across all the edges. I clecoed all of the holes on the trailing edge and I will let them dry for a few days before I start riveting them together.

October 28, 2013 (6 Hrs)

Posted: October 28, 2013 in 21-Aileron

Tonight I clecoed the Trailing Edge (A-1011) to the aileron assembly, removed all of the clecoes on top of the aileron, and placed the assembly with the top facing down on top of my work table.  I weighed it down to help keep everything flat and began slowly riveting all of the components together as per the instructions.  I was able to finish up the Ailerons, except for the Trailing Edges, which I will try and complete in a couple of days.

IMG_8089     IMG_8093

Tonight Dad came down and helped me rivet the Top and Bottom Skins to the Left & Right Aileron Spars. Next I clecoed the Main Ribs (A-1005) to the aileron structure and riveted them together using my rivet squeezer.

IMG_8074     IMG_8076

Then I went back to working on the Aileron Actuation parts and riveted the Threaded Rod Ends (VA-169) to the Torque Tube to Bellcrank Pushrods (W-1017A) using the blind rivets MSP-42. Next I applied some anti-seize onto the threads and installed the Rod End Bearings (MD3614M) and Jam Nuts (AN316-6) into the Threaded Rod Ends. I went ahead and adjusted the bearing center-to-center at approximately 94-7/16”.

IMG_8072

I inserted the Threaded Rod Ends (AN490-HT8P) into the Bellcrank to Aileron Pushrods (W-1018A) and riveted them together using AN470AD4-11 rivets. Next I applied some anti-seize onto the threads and installed the Rod End Bearings (F3414M) and the Jam Nuts (AN316-4) onto the Threaded Rod Ends. As before, I went ahead and adjusted the bearing center-to-center to approximately 25-1/4”.

IMG_8078     IMG_8079

Now I can rivet the Pushrod Ends (VA-162) into all four of the Aileron Torque Tubes (WD-1014) using the MSP-42 blind rivets. Next I reinstalled the Torque Tube Collars (WD-1014C) into the Forward Torque Tube Subassemblies (WD-1014 FORWARD) and bolted them together using the hardware that was called before.

IMG_8080     IMG_8088

October 22, 2013 (3 Hrs)

Posted: October 22, 2013 in 21-Aileron

Now that the parts have had time to dry, I riveted the Doublers (A-1008) and Nutplates (K1000-3) to the Spars (A-1003), then I clecoed the Spacers (A-1014) to the Spars. Next I began attaching the Nose Ribs (A-1004) to the Counterbalances (A-1009) using the Screws (AN526C-632R8) and Lock Nuts (AN365-632A) that was called for. Then I took the counterbalance subassemblies and the Inboard Nose Ribs (A-1015) and clecoed them to the Nose Skins (A-1001A). For the next step the instructions say to rivet the middle Nose Ribs to the Nose Skins using AN426AD3-3.5 rivets; however I found that -4 rivets produced a better shop head when using my hand squeezer. I finished the last two holes in the ribs by using the pull rivets MK-319-BS. With the middle Ribs riveted to the Nose Skins I was able to install and cleco the Spar Assembly to the Nose Ribs and the Skins. I blind riveted the Spar to the middle Nose Rib using LP4-3 rivets and then to the other two Nose Ribs using AN470AD4-5 solid rivets. Finally I inserted the Top Skin Assemblies, between the Spar and Nose Skin, and clecoed every other hole.

IMG_8069     IMG_8070

I used today to prime all of the parts that were ready, including the insides of all the tubes. Now I will let them dry for a few days before I continue.

IMG_8057     IMG_8061

IMG_8066     IMG_8067

IMG_8064     IMG_8058

October 10, 2013 (7 Hrs)

Posted: October 10, 2013 in 21-Aileron

My first task for today was to begin disassembling the Ailerons, which included removing all the clecoes and drilling out the temporary rivets that held the Bottom Skin assembly to the Main Ribs (A-1005). Finally I deburred and dimpled all of the parts.

October 7, 2013 (6 Hrs)

Posted: October 7, 2013 in 21-Aileron

I have spent the last few days working on the Ailerons and for the first step I had to rivet the Bottom Skin assembly to the two Main Ribs (A-1005) using only two temporary rivets in each rib. Next I buffed the edges of the Nose Rib (A-1015) flanges and clecoed them to the spar assembly. I clecoed the Nose Ribs (A-1004) to the Stainless Steel Counterbalance (A-1009) and then was able to cleco them to the spar assembly. Next step had me cleco the Nose Skin (A-1001A) and the Top Skin assembly to the Nose Ribs, the Spar, and the Main Ribs. I laid the assembly flat on the table with the clecoes hanging off the edge and weighed it down with a piece of steel and clamped the Main Ribs to the table. I checked the Nose Skin for any bowing and final-drilled #40 all the common holes. For the next step I clecoed the Trailing Edge (A-1011) onto the Aileron assembly and trimmed off the sides flush with the skins. Finally I final-drilled #40 all the holes on the Trailing Edge and called it a night.

IMG_8007     IMG_8009

IMG_8018     IMG_8021

September 29, 2013 (21 Hrs)

Posted: September 29, 2013 in 21-Aileron

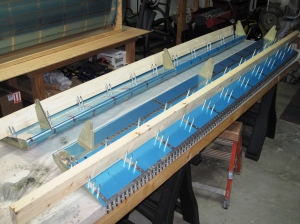
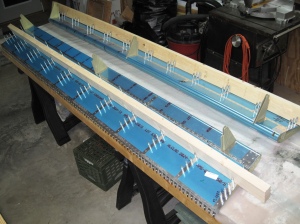
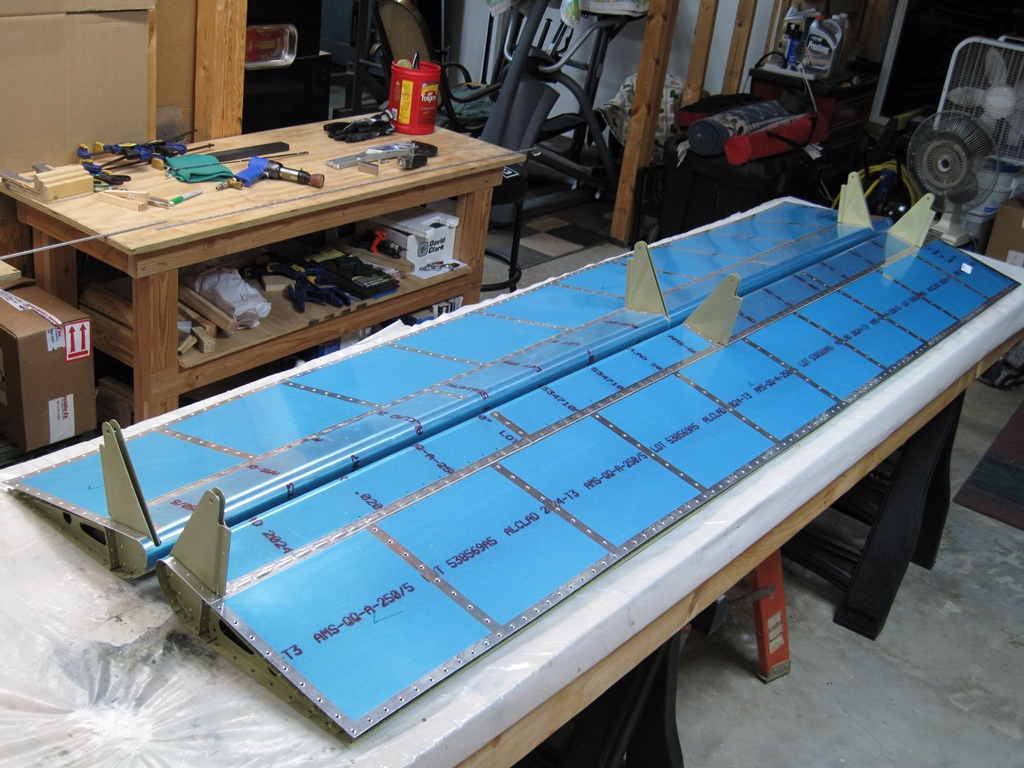
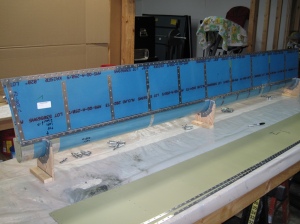
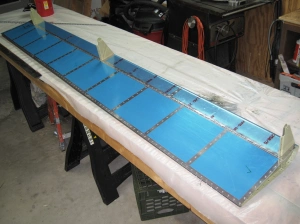
I returned to the Flap Assemblies and started with putting a slight bend into the trailing edges of the Inboard and Outboard Nose Skins (FL-1001A/B). Next I clecoed the Nose Skin to the Flap Assembly and placed them in the cradles. I then removed the clecoes along the top flange of the Spar (FL-1003) and installed the Top Skin (FL-1001C) in between the Nose Skins and the Spar. The next step had me cleco the Nose and Top Skins together with the Spar and Main Ribs (FL-1005).

IMG_7920     IMG_7922

IMG_7924     IMG_7926

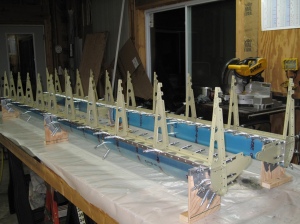
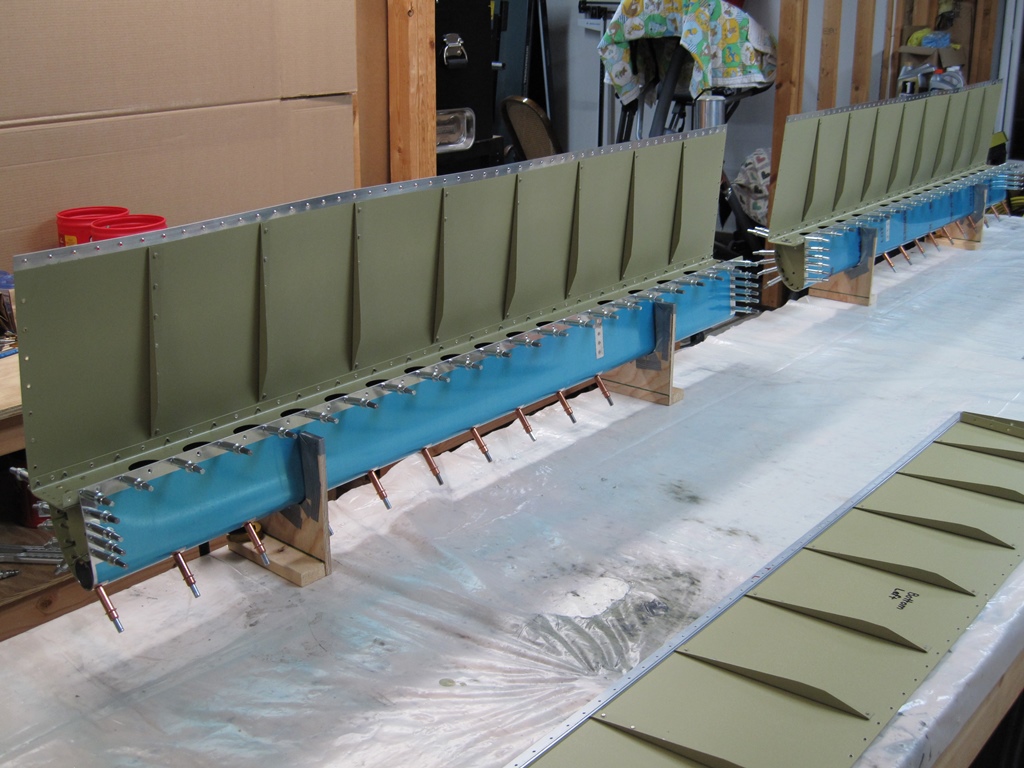
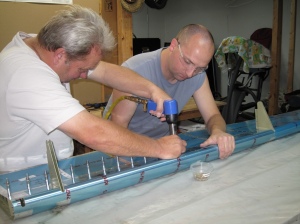
Now I must have got excited that the Flaps were being assembled because I sort of got ahead of the instructions. I began installing the Blind Rivets (MK-319-BS) into the Nose Skins and finished them off by riveting the AN426AD3-3.5 rivets into the outside edges of the Nose Skins. Next with Meghan and Dad’s help, we riveted the Nose Skins, Top Skin, the small flange at the front of the Main Ribs, to the top flange of the Spar. The instructions say to use AN426AD3-3.5 & -4 during this process; however I found that I got much better results when I increased the lengths and used AN426AD3-4 & -4.5 respectively. Next I back riveted the Top Skin to the Main Ribs using the AN426AD3-3.5 & -3 rivets.

IMG_7939     IMG_7936

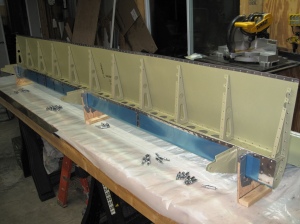
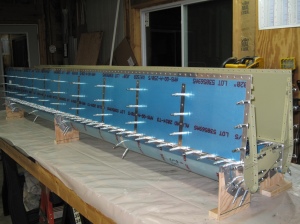
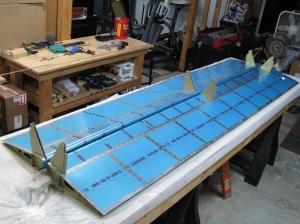
I placed the Flap back into the cradles and removed all the clecoes from the bottom flange of the Spar. I was able to insert the Bottom Skin (FL-1002) between the Nose Skins and the Spar and clecoed them to the bottom flange of the Spar. Again with Dad’s help we got the Bottom & Nose Skins riveted to the Spar.

IMG_7941     IMG_7944

IMG_7949     IMG_7951

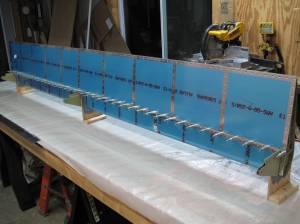
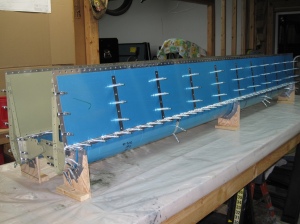
Next I laid the Flaps with the top facing down on my table and cleaned the Trailing Edges (FL-1009A & B) and the contact area of the trailing edges along the Top and Bottom Skins (FL-1001C & -1002). I mixed up a batch of Fuel Tank Sealant, applied it to both sides of the Trailing Edges, and clecoed them to the Top and Bottom Skins. Finally I clecoed the Bottom Skin to the Main Ribs (FL-1005) and placed weight on the Flap to keep it flat until the sealant had cured.

IMG_7958     IMG_7961

January 29, 2013 (3 Hrs)

Posted: January 29, 2013 in 21-Aileron

Since I was on my own tonight I decided to jump ahead and spend a few hours back riveting the Stiffeners (A-710) to the Aileron Top and Bottom Skins (A-1001B & -1002).  I was able to get all four skins finished before calling it a night.

IMG_7310     IMG_7313